Drawing A Quad
This tutorial assumes you are somewhat familiar with Rust, however you can probably get the gist of it if you have worked with Vulkan and Cpp. You can begin by installing Rust if you haven't already. For other dependencies, follow the setup guide for Vulkano.
The App
To get started, let's create our project in your terminal with cargo new cellular_automata and add the following in our Cargo.toml file.
# Cargo.toml

[dependencies]
# For using Vulkano with Bevy
bevy_vulkano = { version = "0.6.0", features = ["gui"] }
# For implementing our custom Vertex types with Vulkano
bytemuck = "1.9.1"
# For creating our graphics / compute pipelines and rendering
vulkano = "0.30.0"
# For compiling shaders to be used with Vulkano
vulkano-shaders = "0.30.0"
# Vulkano Utilities
vulkano-util = "0.30.0"

# Bevy Game framework without default features, because we're replacing the gfx backend with Vulkano
[dependencies.bevy]
version = "0.8.0"
default-features = false
features = []

# For optimization (at the cost of build time)

[profile.dev]
opt-level = 3

[profile.dev.package."*"]
opt-level = 3

[profile.release]
lto = "thin"
We will also be compiling shaders and need cargo to know when we've edited our shaders, so let's add the following build.rs at the root of the project. This way we can keep our shaders neatly in their own folder and get nice syntax highlighting in our IDE (I use CLion) for our glsl shaders.
When you build the app, cargo will check changes that you've made to files in src. Adding this will ensure changes are checked in other places where you specify them.
// build.rs

const SHADER_DIR: &str = "shaders";

// Ensure that we recompile when shaders are changed
fn main() {
    println!("cargo:rerun-if-changed={}", SHADER_DIR);
}
Now let's add our App to the main.rs.
use bevy::{prelude::*, window::{close_on_esc, WindowMode}};
use bevy_vulkano::{VulkanoWinitConfig, VulkanoWinitPlugin};

pub const WIDTH: f32 = 512.0;
pub const HEIGHT: f32 = 512.0;

fn main() {
    App::new()
         // Must be non send resource for now...
        .insert_non_send_resource(VulkanoWinitConfig::default())
        .insert_resource(WindowDescriptor {
            width: WIDTH,
            height: HEIGHT,
            title: "Cellular Automata".to_string(),
            present_mode: bevy::window::PresentMode::Immediate,
            resizable: true,
            mode: WindowMode::Windowed,
            ..WindowDescriptor::default()
        })
        // Add needed (minimum) plugins
        .add_plugin(bevy::core::CorePlugin)
        .add_plugin(bevy::log::LogPlugin)
        .add_plugin(bevy::time::TimePlugin)
        .add_plugin(bevy::diagnostic::DiagnosticsPlugin)
        .add_plugin(bevy::diagnostic::FrameTimeDiagnosticsPlugin)
        .add_plugin(bevy::input::InputPlugin)
        // The plugin to use vulkano with bevy
        .add_plugin(VulkanoWinitPlugin)
        .add_system(close_on_esc)
        .run();
}
Running this should open you a nice empty window, which you can exit with esc button. What's happening here is that Bevy and VulkanoWinitPlugin are adding the core loop which will run systems each frame. An example of a system function is exit_on_esc_system.

Graphical User Interface
To be able to see at least something in the window, let's add an FPS counter to our app GUI. We'll do this using Bevy's systems.
A system (in ECS) is a function that accesses resources (and can query through entity components). In Bevy, you pass your systems to the app which organize your app's behavior. .add_system adds a function to be run at Update stage each frame.
We won't gain the benefits of an ECS in this tutorial, in fact, we don't need any entities. However, I am simply using Bevy for its app's architecture. The systems, events (input) and resource access fits well in a project that might not have any entities. Like this one.
We'll create our GUI system which will organize our user interface. Add gui.rs to src.
use bevy::{
    diagnostic::{Diagnostics, FrameTimeDiagnosticsPlugin},
    prelude::*,
};
use bevy_vulkano::{
    egui_winit_vulkano::{egui, egui::Ui},
    BevyVulkanoWindows,
};

/// Give our text a custom size
fn sized_text(ui: &mut Ui, text: impl Into<String>, size: f32) {
    ui.label(egui::RichText::new(text).size(size));
}

/// System to generate user interface with egui
pub fn user_interface(vulkano_windows: NonSend<BevyVulkanoWindows>, diagnostics: Res<Diagnostics>) {
    let (_, gui) = vulkano_windows.get_primary_window_renderer().unwrap();
    let ctx = gui.context();
    egui::Area::new("fps")
        .fixed_pos(egui::pos2(10.0, 10.0))
        .show(&ctx, |ui| {
            let size = 15.0;
            if let Some(diag) = diagnostics.get(FrameTimeDiagnosticsPlugin::FPS) {
                if let Some(avg) = diag.average() {
                    sized_text(ui, format!("FPS: {:.2}", avg), size);
                }
            }
        });
}
user_interface accesses the gui context through BevyVulkanoWindows resource and we'll read FPS measurement from Bevy's FrameTimeDiagnosticsPlugin.
Then add the system to be run by the app in main.rs.
mod gui;

use crate::gui::user_interface;

// ...
        .add_system(exit_on_esc_system)
        // Add GUI
        .add_system(user_interface)
        .run();
At this point nothing is displayed yet, because we are not drawing our user interface to the window. Let's do that. Add render system to main.rs.
fn main() {
    App::new()
//...
        .add_system_to_stage(CoreStage::PostUpdate, render)
        .run();
}

/// Render the simulation
fn render(mut vulkano_windows: NonSendMut<BevyVulkanoWindows>) {
    // Access our window renderer and gui
    let (window_renderer, gui) = vulkano_windows.get_primary_window_renderer_mut().unwrap();
    // Start frame
    let before = match window_renderer.acquire() {
        Err(e) => {
            bevy::log::error!("Failed to start frame: {}", e);
            return;
        }
        Ok(f) => f,
    };
    // Access the final window image (this is the current GPU image which changes between frames (swapchain))
    let final_image = window_renderer.swapchain_image_view();

    // Draw GUI using egui_winit_window's GUI draw pipeline
    let after_gui = gui.draw_on_image(before, final_image);

    // Finish Frame
    window_renderer.present(after_gui, true);
}
Here we're using the utility from bevy_vulkano giving us access to a simple window renderer struct that can be used to organize our rendering. acquire begins the frame by acquiring the next swapchain image and returning a future struct representing the previous frame end. This future can be used to synchronize our render calls.
The swap chain is a queue of images that are going to be presented to the screen. The
window_renderercontains access to these images and will automatically resize them when window sizes change. If for some reason start frame fails, we return. The final image is the current image to which we wish to draw.
We'll use the gui feature from bevy_vulkano to allow us to draw egui library's user interface over our images. That feature uses eugi_winit_vulkano which contains a Vulkano render pass containing draw commands needed to draw the GUI to an image. We'll do that and then finish the frame by presenting the image in the window.
Note that we're adding the render system to be run after Update stage in Bevy ensuring all of our app's logic will be done by then, assuming our app logic is added to the Update. Running cargo run you should see this:
It's a bit fuzzy. That is because we are never clearing the image, only drawing over it. We can fix this for now with VulkanoWinitConfig.
is_gui_overlay allows you to use the GUI drawing extension from bevy_vulkano as a main render pipeline where the input image will get cleared. You don't want this to happen when you have your own graphical pipelines if they clear your image. But you could render all your scenes to intermediary images and display them as GUI windows. That's one use case where you'd be using the GUI drawing as your main drawing pipeline.
fn main() {
    App::new()
        .insert_non_send_resource(VulkanoWinitConfig {
            is_gui_overlay: false,
            ..VulkanoWinitConfig::default()
        })
        .insert_resource(WindowDescriptor {
        // ...
        .run();
}
Better:
Drawing a Quad
In order to draw things to the screen, we'll need our own graphical pipeline. Let's do one to draw a quad. We'll need a bit more work for this. Create following files to src:
quad_pipeline.rs
render.rs
vertex.rs
utils.rs
And add the following shader files to shaders
quad_frag.glsl
quad_vert.glsl
And lastly, add tree.png (stolen from the amazing wgpu tutorial) to assets folder.
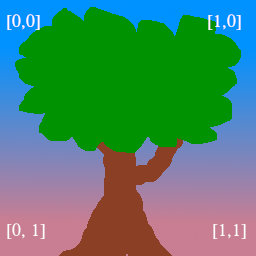
We'll use the tree to check that we are rendering our quad correctly.
To render a quad, you need to have
- Render pass containting your draw pipeline(s) and organizing frame buffers.
RenderPassandFramebuffer(s)describe on which images the implementation will draw - Draw pipeline(s), which will describe how you'll draw
- Shaders that the draw pipelines use which describe what gpu will do with vertices and what it will do to pixels between vertices (rasterize)
Here is a brief summary of Vulkan to help you understand a bit better. But let's implement these now.
Vertex
Let's add our vertex data. This will be our struct that describes how we'll pass our quad (triangles) as buffers to the GPU. It contains 2D position, uv coordinates and color. We need the repr(c) and bytemuck derive macros for Vulkano.
# vertex.rs

use bytemuck::{Pod, Zeroable};

/// Vertex for textured quads.
#[repr(C)]
#[derive(Default, Debug, Copy, Clone, Zeroable, Pod)]
pub struct TexturedVertex {
    pub position: [f32; 2],
    pub tex_coords: [f32; 2],
    pub color: [f32; 4],
}
// Implement vertex so Vulkano knows how to read our struct as we create the buffers
// Add each of your struct param separately to this macro
vulkano::impl_vertex!(TexturedVertex, position, tex_coords, color);
Then add a utility struct for a textured quad. Our textured quad will contain the vertex data for our quad canvas.
/// Textured quad with vertices and indices
#[derive(Default, Debug, Copy, Clone)]
pub struct TexturedQuad {
    pub vertices: [TexturedVertex; 4],
    pub indices: [u32; 6],
}

/// A set of vertices and their indices as cpu accessible buffers
#[derive(Clone)]
pub struct Mesh {
    pub vertices: Arc<CpuAccessibleBuffer<[TexturedVertex]>>,
    pub indices: Arc<CpuAccessibleBuffer<[u32]>>,
}

impl TexturedQuad {
    /// Creates a new textured quad with given width and height at (0.0, 0.0)
    pub fn new(width: f32, height: f32, color: [f32; 4]) -> TexturedQuad {
        TexturedQuad {
            vertices: [
                TexturedVertex {
                    position: [-(width / 2.0), -(height / 2.0)],
                    tex_coords: [0.0, 1.0],
                    color,
                },
                TexturedVertex {
                    position: [-(width / 2.0), height / 2.0],
                    tex_coords: [0.0, 0.0],
                    color,
                },
                TexturedVertex {
                    position: [width / 2.0, height / 2.0],
                    tex_coords: [1.0, 0.0],
                    color,
                },
                TexturedVertex {
                    position: [width / 2.0, -(height / 2.0)],
                    tex_coords: [1.0, 1.0],
                    color,
                },
            ],
            indices: [0, 2, 1, 0, 3, 2],
        }
    }

    /// Converts Quad data to a mesh that can be used in drawing
    pub fn to_mesh(self, device: Arc<Device>) -> Mesh {
        Mesh {
            vertices: CpuAccessibleBuffer::<[TexturedVertex]>::from_iter(
                device.clone(),
                BufferUsage::vertex_buffer(),
                false,
                self.vertices.into_iter(),
            )
            .unwrap(),
            indices: CpuAccessibleBuffer::<[u32]>::from_iter(
                device.clone(),
                BufferUsage::index_buffer(),
                false,
                self.indices.into_iter(),
            )
            .unwrap(),
        }
    }
}
You could omit the indices if you wanted to, but we'll be drawing our quad with indices. Notice that our triangles will be oriented clockwise (in Vulkan, negative direction is at the top for y)). TexturedQuad::new(1.0, 1.0, [1.0;4]) would create a white quad between -0.5 and 0.5 coordinates for X and Y.
The orientation of your triangles matters or doesn't matter depending on your graphical pipelines. You could tell the GPU in your pipeline that it should ignore (Cull) triangles that are not facing towards you. This decision takes place when you define your pipeline.
We'll use the Mesh struct to pass the data to the GPU when we're drawing. Notice that we'll need to pass the usage of our buffers BufferUsage::vertex_buffer(). In Vulkano, CpuAccessibleBuffer are buffers which we can modify on the CPU side.
Render Pass
Then let's add our RenderPass struct to render.rs. We can call it FillScreenRenderPass. It's purpose will be to fill the screen with whatever we want to draw. Renderpass will describe how we want to organize our rendering. You could have just one of them, or many. One can have many subpasses (e.g. for triangles, then lighting) too, or just one. It all depends on your needs.
Subpasses are subsequent rendering operations that depend on the contents of framebuffers in previous passes
We'll just have one subpass for our simple app. If you want to know more what's going on here, feel free to check out Vulkano Tutorial, or even better: Vulkan Tutorial.
use std::sync::Arc;

use vulkano_util::renderer::DeviceImageView;
use vulkano::{
    command_buffer::{
        AutoCommandBufferBuilder, CommandBufferInheritanceInfo, CommandBufferUsage,
        RenderPassBeginInfo, SubpassContents,
    },
    device::Queue,
    format::Format,
    image::{ImageAccess, ImageViewAbstract},
    render_pass::{Framebuffer, FramebufferCreateInfo, RenderPass, Subpass},
    sync::GpuFuture,
};

/// A render pass which places an image over screen frame
pub struct FillScreenRenderPass {
    gfx_queue: Arc<Queue>,
    render_pass: Arc<RenderPass>,
}

impl FillScreenRenderPass {
    pub fn new(gfx_queue: Arc<Queue>, output_format: Format) -> FillScreenRenderPass {
        let render_pass = vulkano::single_pass_renderpass!(gfx_queue.device().clone(),
            attachments: {
                color: {
                    // Image is cleared at the start of render pass
                    load: Clear,
                    store: Store,
                    format: output_format,
                    samples: 1,
                }
            },
            pass: {
                    color: [color],
                    depth_stencil: {}
            }
        )
        .unwrap();
        let subpass = Subpass::from(render_pass.clone(), 0).unwrap();
        FillScreenRenderPass {
            gfx_queue,
            render_pass,
        }
    }

    /// Place view exactly over swapchain image target.
    /// Texture draw pipeline uses a quad onto which it places the view.
    pub fn draw<F>(
        &mut self,
        before_future: F,
        target: SwapchainImageView,
        clear_color: [f32; 4],
    ) -> Box<dyn GpuFuture>
    where
        F: GpuFuture + 'static,
    {
        // Create framebuffer (must be in same order as render pass description in `new`)
        let framebuffer = Framebuffer::new(self.render_pass.clone(), FramebufferCreateInfo {
            attachments: vec![target],
            ..Default::default()
        })
        .unwrap();
        // Create primary command buffer builder and begin render pass with black clear color
        let mut command_buffer_builder = AutoCommandBufferBuilder::primary(
            self.gfx_queue.device().clone(),
            self.gfx_queue.family(),
            CommandBufferUsage::OneTimeSubmit,
        )
        .unwrap();
        command_buffer_builder
            .begin_render_pass(
                RenderPassBeginInfo {
                    clear_values: vec![Some(clear_color.into())],
                    ..RenderPassBeginInfo::framebuffer(framebuffer)
                },
                SubpassContents::SecondaryCommandBuffers,
            )
            .unwrap();
        // Draw here
        // ...
        //
        command_buffer_builder.end_render_pass().unwrap();
        let command_buffer = command_buffer_builder.build().unwrap();
        before_future
            .then_execute(self.gfx_queue.clone(), command_buffer)
            .unwrap()
            .boxed()
    }
}
In new: We're simply defining our RenderPass structure, or shape. And in draw, we'll pass the inputs for a FrameBuffer, create a command buffer to begin a render pass, add what we need to draw in our subpasses, execute the subpasses and then execute out main command buffer.
In Vulkan and Vulkano (crate), you are simply describing a bunch of structs, which hold your data and will then describe a bunch of commands (buffers), which are then passed on to GPU for execution. Having this explicit access to organize your pipelines will allow the drivers to better optimize and improve performance as opposed to a more general rendering with e.g. OpenGL. You'll get more control with the cost of verbosity.
Then let's create our FillScreenRenderPass instance in main.rs. Add the following there. We need to create our render pipeline inside our setup startup system.
mod render;

pub const CLEAR_COLOR: [f32; 4] = [0.0; 4];

fn main() {
    App::new()
         //..
        .add_startup_system(setup) // Add this!
        .add_system(exit_on_esc_system)
         //..
}

/// Creates our simulation and render pipelines
fn setup(
    mut commands: Commands,
    vulkano_windows: NonSend<BevyVulkanoWindows>,
) {
    let (primary_window_renderer, _gui) = vulkano_windows.get_primary_window_renderer().unwrap();
    // Create our render pass
    let fill_screen = FillScreenRenderPass::new(
        primary_window_renderer.graphics_queue(),
        primary_window_renderer.swapchain_format(),
    );

    // Insert resources
    commands.insert_resource(fill_screen);
}

fn render(
    //.., Access render pass resource here for rendering
    mut fill_screen: ResMut<FillScreenRenderPass>,
) {
    // ... Now we must draw before drawing our GUI
    let after_images = fill_screen.draw(before, final_image.clone(), CLEAR_COLOR);

    // Draw GUI
    let after_gui = window_renderer
        .gui()
        .draw_on_image(after_images /*switch from before to this!*/, final_image);

    // Finish Frame
    window_renderer.present(after_gui, true);
}
Draw Pipeline
Running our render pass creation will not draw anything yet. We must create our drawing pipeline and shaders. Add following to quad_pipeline.rs.
use std::sync::Arc;

use vulkano::{
    buffer::TypedBufferAccess,
    command_buffer::{AutoCommandBufferBuilder, CommandBufferInheritanceInfo, CommandBufferUsage, SecondaryAutoCommandBuffer},
    device::Queue,
    image::ImageViewAbstract,
    pipeline::{
        graphics::{
            input_assembly::InputAssemblyState,
            vertex_input::BuffersDefinition,
            viewport::{Viewport, ViewportState},
        },
        GraphicsPipeline, Pipeline, PipelineBindPoint,
    },
    render_pass::Subpass,
};

use crate::{
    utils::create_image_sampler_nearest_descriptor_set,
    vertex::{Mesh, TexturedQuad, TexturedVertex},
};

/// Pipeline to draw pixel perfect images on quads
pub struct DrawQuadPipeline {
    gfx_queue: Arc<Queue>,
    pipeline: Arc<GraphicsPipeline>,
    subpass: Subpss,
    quad: Mesh,
}

impl DrawQuadPipeline {
    pub fn new(gfx_queue: Arc<Queue>, subpass: Subpass) -> DrawQuadPipeline {
        // Notice that we'll create our quad only once here!
        let quad = TexturedQuad::new(1.0, 1.0, [1.0; 4]).to_mesh(gfx_queue.device().clone());
        let pipeline = {
            let vs = vs::load(gfx_queue.device().clone()).expect("failed to create shader module");
            let fs = fs::load(gfx_queue.device().clone()).expect("failed to create shader module");
            GraphicsPipeline::start()
                .vertex_input_state(BuffersDefinition::new().vertex::<TexturedVertex>())
                .vertex_shader(vs.entry_point("main").unwrap(), ())
                .input_assembly_state(InputAssemblyState::new())
                .fragment_shader(fs.entry_point("main").unwrap(), ())
                .viewport_state(ViewportState::viewport_dynamic_scissor_irrelevant())
                .render_pass(subpass.clone())
                .build(gfx_queue.device().clone())
                .unwrap()
        };
        DrawQuadPipeline {
            gfx_queue,
            pipeline,
            subpass,
            quad,
        }
    }

    /// Draw input `image` on a quad at (0.0, 0.0), between -1.0 and 1.0
    pub fn draw(
        &mut self,
        viewport_dimensions: [u32; 2],
        image: Arc<dyn ImageViewAbstract>,
    ) -> SecondaryAutoCommandBuffer {
        let mut builder = AutoCommandBufferBuilder::secondary(
            self.gfx_queue.device().clone(),
            self.gfx_queue.family(),
            CommandBufferUsage::MultipleSubmit,
            CommandBufferInheritanceInfo {
                render_pass: Some(self.subpass.clone().into()),
                ..Default::default()
            },
        )
        .unwrap();

        let image_sampler_descriptor_set = create_image_sampler_nearest_descriptor_set(
            self.gfx_queue.device().clone(),
            self.pipeline.clone(),
            image,
        );
        builder
            .set_viewport(0, [Viewport {
                origin: [0.0, 0.0],
                dimensions: [viewport_dimensions[0] as f32, viewport_dimensions[1] as f32],
                depth_range: 0.0..1.0,
            }])
            .bind_pipeline_graphics(self.pipeline.clone())
            .bind_descriptor_sets(
                PipelineBindPoint::Graphics,
                self.pipeline.layout().clone(),
                0,
                image_sampler_descriptor_set,
            )
            .bind_vertex_buffers(0, self.quad.vertices.clone())
            .bind_index_buffer(self.quad.indices.clone())
            .draw_indexed(self.quad.indices.len() as u32, 1, 0, 0, 0)
            .unwrap();
        builder.build().unwrap()
    }
}

mod vs {
    vulkano_shaders::shader! {
        ty: "vertex",
        path: "shaders/quad_vert.glsl"
    }
}

mod fs {
    vulkano_shaders::shader! {
        ty: "fragment",
        path: "shaders/quad_frag.glsl"
    }
}
DrawQuadPipeline::new will decribe our draw pipeline to Vulkan including which shaders to use and how the draw will actually draw the content to our screen.
DrawQuadPipeline::draw will create the command buffers that our render pass will execute while passing the necessary data for our draw function.
And add following to main.rs
mod vertex;
mod quad_pipeline;
Now, let's use DrawQuadPipeline in our FillScreenRenderPass.
pub struct FillScreenRenderPass {
    //...
    quad_pipeline: DrawQuadPipeline,
}

impl FillScreenRenderPass {
    pub fn new(gfx_queue: Arc<Queue>, output_format: Format) -> FillScreenRenderPass {
        //... Add our pipeline to a subpass (you could draw directly or use subpasses)
        let subpass = Subpass::from(render_pass.clone(), 0).unwrap();
        let quad_pipeline = DrawQuadPipeline::new(gfx_queue.clone(), subpass);
        FillScreenRenderPass {
            // ..
            quad_pipeline,
        }
    }

    /// Place view exactly over swapchain image target.
    /// Texture draw pipeline uses a quad onto which it places the view.
    pub fn draw<F>(
        &mut self,
        before_future: F,
        image: Arc<dyn ImageViewAbstract>,
        //...
    ) -> Box<dyn GpuFuture>
    where
        F: GpuFuture + 'static,
    {
        let target_image = target.image().dimensions(); // New
        // ...
        command_buffer_builder
            .begin_render_pass(//...
		// ...
        // New ==> We'll create our draw commands here. And then execute it
        let cb = self.quad_pipeline.draw(target_image.width_height(), image);
        command_buffer_builder.execute_commands(cb).unwrap();
        // <==
        command_buffer_builder.end_render_pass().unwrap();
        //...
    }
}
And to be able to compile the code, add following to utils.rs
use std::sync::Arc;

use vulkano::{
    descriptor_set::{PersistentDescriptorSet, WriteDescriptorSet},
    device::Device,
    image::ImageViewAbstract,
    pipeline::{GraphicsPipeline, Pipeline},
    sampler::{Filter, Sampler, SamplerAddressMode, SamplerCreateInfo, SamplerMipmapMode},
};

/// Creates a descriptor set for sampled image descriptor set using nearest sampling. This means that the image
/// will be pixel perfect.
pub fn create_image_sampler_nearest_descriptor_set(
    device: Arc<Device>,
    pipeline: Arc<GraphicsPipeline>,
    image: Arc<dyn ImageViewAbstract>,
) -> Arc<PersistentDescriptorSet> {
    let layout = pipeline.layout().set_layouts().get(0).unwrap();
    let sampler = Sampler::new(device, SamplerCreateInfo {
        mag_filter: Filter::Nearest,
        min_filter: Filter::Nearest,
        address_mode: [SamplerAddressMode::Repeat; 3],
        mipmap_mode: SamplerMipmapMode::Nearest,
        ..Default::default()
    })
    .unwrap();
    PersistentDescriptorSet::new(layout.clone(), [WriteDescriptorSet::image_view_sampler(
        0,
        image.clone(),
        sampler,
    )])
    .unwrap()
}
We'll be adding all kinds of useful functions to utils.rs just to keep our code a bit cleaner. And don't forget to add mod utils; to main.rs.
We'll also need to pass the image we intend to draw to our FillScreenRenderPass::draw in main.rs. So let's load our tree.png image now.
/// Vulkano image to be passed as an input to an image sample in our quad pipeline
struct TreeImage(Arc<dyn ImageViewAbstract + Send + Sync + 'static>);

/// Creates our simulation and render pipelines
fn setup(
    mut commands: Commands,
    vulkano_windows: NonSend<BevyVulkanoWindows>,
) {
    //... Util function from bevy_vulkano
    let tree_image = texture_from_file_bytes(
        primary_window_renderer.graphics_queue(),
        include_bytes!("../assets/tree.png"),
        Format::R8G8B8A8_SRGB, // required to be srg
    )
    .unwrap();
    commands.insert_resource(TreeImage(tree_image));
    //..
}

fn render(
    //...
    tree_image: Res<TreeImage>, // New
) {
    //... New
    let tree_image = tree_image.0.clone();
    // ...
    let final_image = window_renderer.swapchain_image_view();
    let after_images = fill_screen.draw(before, tree_image, final_image.clone(), CLEAR_COLOR);
    //...
}
At this point, if you'll run the app you'll get shader compilation errors. That's our last thing to do before we'll see something.
Vertex shader tells the GPU what to do with our vertices. The layout here must match the our TexturedVertex struct, which was passed to be used in our quad pipeline. We'll then output uv coordinates and color to fragment shader.
// quad_vert.glsl

#version 450
layout(location=0) in vec2 position;
layout(location=1) in vec2 tex_coords;
layout(location=2) in vec4 color;

layout(location = 0) out vec2 v_tex_coords;
layout(location = 1) out vec4 v_color;

void main() {
    gl_Position = vec4(position, 0.0, 1.0);
    v_tex_coords = tex_coords;
    v_color = color;
}
Fragment shader tells the GPU how to rasterize (fill pixels between the vertices). We'll sample our texture here and multiply it with the color of our vertices. If our vertices had a color other than white, it would tint the color of what we draw.
// quad_frag.glsl

#version 450
layout(location = 0) in vec2 v_tex_coords;
layout(location = 1) in vec4 v_color;

layout(location = 0) out vec4 f_color;

layout(set = 0, binding = 0) uniform sampler2D tex;

void main() {
    vec4 color = texture(tex, v_tex_coords);
    f_color = color * v_color;
}
Alright, let's run it! Nothing? Just switch VulkanoWinitConfig to VulkanoWinitConfig::default() in fn main() so we won't be clearing our image anymore when we draw the GUI. Good to go!
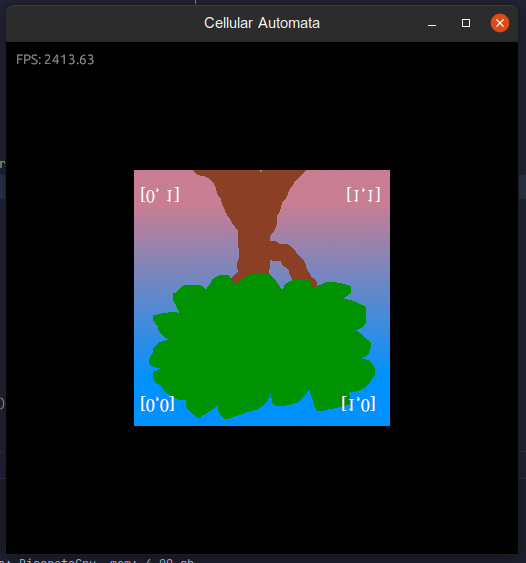
Oh well, something's wrong though. Our tree is upside down. However, otherwise it looks good. Quite a lot of work for drawing a quad, but we aren't done yet.
The tree is upside down, because we are not correctly transforming our vertices to the right coordinate system. If you try rescaling the window, you'll see that the image gets distorted. We don't want that. So let's finalize our quad with a Camera, that's responsible for transforming our vertices correctly.
Camera and Transform
We need to modify our vertex data in such a way that our quad displays correctly in the 2D space of the screen. We are going to need a* projection matrix* and a view matrix to multiply our vertices to convert them into clip space coordinates. We could just hard code the matrices to our shaders. Or we could multiply vertices on the CPU side, but I think the easiest and scalable way right now is to create a Camera struct whose matrices we can pass to shaders at runtime. That way we can simply adjust our camera parameters for moving and zooming.
Add the following to camera.rs. We are creating a simple orthographic camera, because we live in 2D space and are not interested in 3D in this tutorial. To keep our quad looking correct over time when scaling or using different resolutions, we will need an update method for the camera to update the screen at run time.
And we'll need a world_to_screen functionality which will be used in converting the vertices in our shaders.
// camera.rs

use bevy::{
    math::{Mat4, Vec2},
    prelude::Transform,
};

// c1r1: y flipped for vulkan.
#[rustfmt::skip]
pub const OPENGL_TO_VULKAN_MATRIX: Mat4 = Mat4::from_cols_array(&[
    1.0, 0.0, 0.0, 0.0,
    0.0, -1.0, 0.0, 0.0,
    0.0, 0.0, 0.5, 0.0,
    0.0, 0.0, 0.5, 1.0,
]);

const Z_POS: f32 = -10.0;

/// A simple orthographic camera
#[derive(Debug, Copy, Clone)]
pub struct OrthographicCamera {
    pub pos: Vec2,
    pub left: f32,
    pub right: f32,
    pub bottom: f32,
    pub top: f32,
    pub near: f32,
    pub far: f32,
    pub scale: f32,
}

impl OrthographicCamera {
    /// After window size changes, update our camera
    pub fn update(&mut self, width: f32, height: f32) {
        let half_width = width / 2.0;
        let half_height = height / 2.0;
        self.left = -half_width;
        self.right = half_width;
        self.top = half_height;
        self.bottom = -half_height;
    }

    /// Get world to screen matrix to be passed to our rendering
	/// This is basically projection * view
    pub fn world_to_screen(&self) -> Mat4 {
        (OPENGL_TO_VULKAN_MATRIX
            * Mat4::orthographic_rh(
                self.left * self.scale,
                self.right * self.scale,
                self.bottom * self.scale,
                self.top * self.scale,
                self.near,
                self.far,
            ))
            * Transform::from_translation(self.pos.extend(Z_POS)).compute_matrix()
    }
}

impl Default for OrthographicCamera {
    fn default() -> Self {
        OrthographicCamera {
            pos: Vec2::new(0.0, 0.0),
            left: -1.0,
            right: 1.0,
            bottom: -1.0,
            top: 1.0,
            near: 0.0,
            far: 1000.0,
            scale: 1.0,
        }
    }
}
Then add our camera behavior to our app in main.rs
// main.rs

fn setup(
    //...
) {
    // ...
    // Create simple orthographic camera
    let camera = OrthographicCamera::default();
    commands.insert_resource(camera);
}
Add it as an input to our render pipeline
// render.rs
    pub fn draw<F>(
        //...
        before_future: F,
        camera: OrthographicCamera,// New ..
    ) -> Box<dyn GpuFuture>
    where
        F: GpuFuture + 'static,
    {
        //...
        let cb =
            self.quad_pipeline
                .draw(target_image.width_height(), camera /*new!*/, image, flip_x, flip_y);
        //...
    }
And camera as an input to quad draw pipeline
// quad_draw_pipeline.rs
    pub fn draw(
        &mut self,
        viewport_dimensions: [u32; 2],
        camera: OrthographicCamera, // New
        image: Arc<dyn ImageViewAbstract>,
    ) -> SecondaryAutoCommandBuffer {
        //... Add push constants (world to screen in the right format)
        let push_constants = vs::ty::PushConstants {
            world_to_screen: camera.world_to_screen().to_cols_array_2d(),
        };

        builder
             //...
            .bind_descriptor_sets(
             //...
            .push_constants(self.pipeline.layout().clone(), 0, push_constants) // New
             //...
            .draw_indexed(self.quad.indices.len() as u32, 1, 0, 0, 0)
            .unwrap();
        builder.build().unwrap()
    }
We are using push constants to pass data to our draw command. Let's add them to our vertex shader. This way we are taking advantage of the GPUs highly parallel capability to do our calculation, and don't have to do this CPU side. Though a single matrix multiplication would not mean anything. But for many quads, it may compound.
#version 450
// ...

layout(push_constant) uniform PushConstants {
    mat4 world_to_screen;
} push_constants;

// ...

void main() {
    gl_Position =  push_constants.world_to_screen * vec4(position, 0.0, 1.0);
    v_tex_coords = tex_coords;
    v_color = color;
}
And last, update our camera over time:
// main.rs

.add_system(update_camera)

/// Update camera (if window is resized)
fn update_camera(windows: Res<Windows>, mut camera: ResMut<OrthographicCamera>) {
    let window = windows.get_primary().unwrap();
    camera.update(window.width(), window.height());
}
Now if you run the program you'll notice that our image is tiny. Only about one pixel in size. The reason for this is that we are updating our camera to be between -half width and half width, and same for the height. This means our units are in pixels. We could force the camera to use the default values (-1.0 to 1.0) and multiply those with the aspect ratio. However, we can just pass another variable in push_constants and scale our vertices to be of exact pixel size based on our image dimensions.
In DrawQuadPipeline add the following push constant:
// quad_pipeline.rs
use vulkano::image::ImageAccess;

        // ...
        let dims = image.image().dimensions();
        let push_constants = vs::ty::PushConstants {
            world_to_screen: camera.world_to_screen().to_cols_array_2d(),
            // Scale transforms our 1.0 sized quad to actual pixel size in screen space
            scale: [
                dims.width() as f32,
                dims.height() as f32,
            ],
        };
And to quad_vert.glsl
layout(push_constant) uniform PushConstants {
    mat4 world_to_screen;
    vec2 scale;
} push_constants;

// ...

    gl_Position =  push_constants.world_to_screen * vec4(position * push_constants.scale, 0.0, 1.0);
Now you should see the image correctly in right pixels and see it keeping the shape when scaling the window.
Let's just do one final thing. Let's allow ourselves to zoom and move the camera. Add following to main.rs
// main.rs
pub const CAMERA_MOVE_SPEED: f32 = 200.0;

//...
.add_system(input_actions)
//...

/// Input actions for camera movement, zoom and pausing
fn input_actions(
    time: Res<Time>,
    mut camera: ResMut<OrthographicCamera>,
    keyboard_input: Res<Input<KeyCode>>,
    mut mouse_input_events: EventReader<MouseWheel>,
) {
    // Move camera with arrows and WASD
    let up = keyboard_input.pressed(KeyCode::W) || keyboard_input.pressed(KeyCode::Up);
    let down = keyboard_input.pressed(KeyCode::S) || keyboard_input.pressed(KeyCode::Down);
    let left = keyboard_input.pressed(KeyCode::A) || keyboard_input.pressed(KeyCode::Left);
    let right = keyboard_input.pressed(KeyCode::D) || keyboard_input.pressed(KeyCode::Right);

    let x_axis = -(right as i8) + left as i8;
    let y_axis = -(up as i8) + down as i8;

    let mut move_delta = Vec2::new(x_axis as f32, y_axis as f32);
    if move_delta != Vec2::ZERO {
        move_delta /= move_delta.length();
        camera.pos += move_delta * time.delta_seconds() * CAMERA_MOVE_SPEED;
    }

    // Zoom camera with mouse scroll
    for e in mouse_input_events.iter() {
        if e.y < 0.0 {
            camera.scale *= 1.05;
        } else {
            camera.scale *= 1.0 / 1.05;
        }
    }
}
Now we are ready to implement a grid canvas for drawing on it. And we can get rid of our tree :).
You can checkout the full source code for this part of the tutorial here
Give feedback here
Was this page helpful?